Maintaining the aesthetic and structural integrity of vehicles often necessitates minor cosmetic repairs, particularly for those on a budget. Body repair putty serves as an indispensable material for addressing minor dents, scratches, and imperfections, allowing individuals to undertake DIY solutions rather than incurring the expense of professional services. The accessibility and affordability of quality body repair putty have democratized vehicle maintenance, empowering car owners to achieve a polished finish. Consequently, identifying the best body repair putty under $20 is crucial for cost-effective and effective restoration efforts.
This article delves into a comprehensive review and buying guide specifically curated to help consumers navigate the market for economical yet effective automotive repair compounds. We will explore key features, application techniques, and user feedback to highlight the leading products available at a budget-friendly price point. Our objective is to equip readers with the knowledge necessary to select the best body repair putty under $20, ensuring successful and satisfying repairs for their vehicles.
We will discuss the best body repair putty under $20 further down, but for now, consider checking out these related items on Amazon:


Last update on 2026-02-15 / Affiliate links / #ad / Images from Amazon Product Advertising API
Analytical Overview of Body Repair Putty Under $20
The market for affordable body repair putties, specifically those under the $20 price point, is surprisingly robust and caters to a significant segment of DIY enthusiasts and budget-conscious car owners. Key trends observed in this segment include a strong emphasis on ease of use, rapid curing times, and versatile adhesion across various automotive surfaces like metal, fiberglass, and plastic. Many of these products are formulated for minimal shrinkage and sandability, allowing for a smooth finish with readily available sandpaper grades. The prevalence of water-based or low-VOC formulas also reflects a growing consumer demand for safer and more environmentally friendly options.
The primary benefits of choosing a body repair putty under $20 are evident in its accessibility and effectiveness for minor repairs. These putties are ideal for filling small dents, scratches, rust pits, and imperfections, saving users considerable money compared to professional body shop services. Their forgiving nature means that mistakes are often easily corrected, making them an excellent learning tool for aspiring auto body repairers. Furthermore, the widespread availability of these products through online retailers and auto parts stores ensures that consumers can quickly find solutions for their repair needs without significant investment.
However, several challenges are inherent in this budget-friendly category. While many excel at minor cosmetic fixes, their durability and long-term performance for larger or more structurally significant repairs may be compromised. Some lower-cost formulations can be prone to cracking or delaminating over time, especially when exposed to extreme temperature fluctuations or significant flexing of the repaired panel. The quality of the included application tools, if any, can also be inconsistent, often requiring users to purchase separate, better-quality spreaders for optimal application and finishing.
Despite these limitations, the availability of the best body repair putty under $20 empowers individuals to undertake a range of common automotive cosmetic repairs effectively. For those prioritizing cost-savings and tackling minor aesthetic issues, these putties represent a valuable and accessible solution. The continued innovation in formulations, even within this price bracket, suggests that users can expect increasingly user-friendly and durable products for their DIY projects, making professional-looking results achievable for the average consumer.
Best Body Repair Putty Under $20 – Reviewed
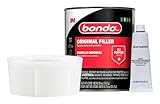
Bondo 270 All-Purpose Body Filler
Bondo 270 All-Purpose Body Filler consistently delivers reliable performance for a variety of automotive repair applications, justifying its competitive price point. Its formulation offers good adhesion to metal, fiberglass, and wood substrates, creating a durable bond essential for structural integrity. The filler exhibits a smooth consistency, facilitating easy mixing with its accompanying hardener. Curing time is typically around 30-45 minutes at room temperature, allowing for efficient workflow without compromising on strength. Notably, its sandability is excellent, reaching a smooth, workable surface with minimal effort, which is crucial for achieving a seamless finish prior to painting.
The value proposition of Bondo 270 lies in its versatility and widespread availability, making it an accessible option for both novice and experienced DIYers. The 20-ounce container provides a substantial amount of product for tackling multiple repair projects, offering cost-effectiveness compared to larger professional-grade fillers. Its low shrinkage rate post-curing is a significant advantage, reducing the likelihood of cracks or distortions in the repaired area over time. While not possessing the ultra-fine finishing capabilities of some premium fillers, its robust performance and ease of use for general repairs firmly establish it as a top contender under the $20 mark.
Evercoat Rage Gold Lightweight Body Filler
Evercoat Rage Gold Lightweight Body Filler is a highly regarded product known for its exceptional workability and smooth finish, making it a standout choice for cosmetic repairs. Its lightweight composition contributes to easier spreading and application, reducing user fatigue during longer repair sessions. The filler boasts excellent adhesion to a wide range of automotive surfaces, including steel, aluminum, and fiberglass, ensuring a strong and lasting repair. Once cured, which typically takes approximately 20-25 minutes under standard conditions, Rage Gold offers superior sandability, allowing for a glass-like finish with minimal grit or tearing.
The value derived from Evercoat Rage Gold stems from its ability to produce professional-quality results at an affordable price. The 20-ounce tub provides ample material for common auto body touch-ups and minor dent repairs, offering a cost-effective solution for achieving a factory-smooth appearance. Its minimal pinholes and low shrinkage characteristics further contribute to its superior performance, minimizing the need for extensive sanding or reapplication. For automotive enthusiasts seeking a filler that prioritizes ease of use and a pristine finish without breaking the bank, Rage Gold represents an excellent investment.
3M Bondo Red Glaze Spot and Nail Hole Filler
3M Bondo Red Glaze Spot and Nail Hole Filler excels in its specific application for filling minor imperfections and creating a smooth surface ready for primer. Its exceptionally fine consistency allows for precise application into small scratches, dents, and pinholes, effectively eliminating surface irregularities. The filler adheres strongly to primed metal, fiberglass, and cured paint surfaces, providing a stable foundation for subsequent finishing steps. Its curing process is rapid, typically within 15-20 minutes, facilitating a swift completion of detail work. The sandability is remarkable, easily achieving a feather-edge finish with fine-grit sandpaper, which is critical for seamless integration with the surrounding paint.
The value of 3M Bondo Red Glaze is evident in its targeted effectiveness and minimal waste. The 8-ounce container, while smaller than other options, is perfectly suited for its intended purpose of tackling minor cosmetic flaws, preventing over-application. Its low shrink properties ensure that filled imperfections remain flush with the surface as the product cures, negating the need for rework. For users prioritizing a flawless finish on small areas and seeking a product that simplifies the final stages of body repair, this glaze offers exceptional performance and cost-efficiency within its niche.
Quixx Repair System Scratch Remover Kit
While not a traditional body putty, the Quixx Repair System Scratch Remover Kit offers an innovative approach to minor surface damage that falls within the under $20 price point, providing significant value for cosmetic improvements. This two-step system utilizes a fine abrasive paste and a polishing compound to mechanically remove light scratches and scuffs from clear coats. The abrasive paste effectively levels the damaged clear coat layer, while the polishing compound restores the gloss and reflectivity of the surrounding paintwork. Its ease of use is a primary advantage, requiring minimal specialized knowledge or tools, making it accessible for at-home car detailing.
The value of the Quixx Repair System is its ability to restore the appearance of minor surface damage without the need for filler or repainting, thus saving considerable cost and effort. The kit is designed to tackle a range of superficial imperfections, from fingernail scratches around door handles to light abrasion marks. While it is not suitable for deep scratches that penetrate the base coat, its effectiveness on clear coat damage offers a cost-effective alternative to professional touch-ups. The kit provides enough material for several applications, further enhancing its economic appeal for maintaining vehicle aesthetics.
Dynatron Dynatron 550 Dyna-Blue Body Filler
Dynatron 550 Dyna-Blue Body Filler offers a balance of performance and affordability, making it a reliable choice for general automotive body repairs. Its blue coloration aids in visibility during application and sanding, helping to distinguish the filler from the substrate. The filler exhibits good adhesion to steel, aluminum, and fiberglass, forming a solid and durable repair. Its consistency is manageable, allowing for straightforward mixing with the recommended hardener. Curing time is typically around 25-30 minutes at room temperature, providing sufficient working time while still allowing for prompt sanding.
The value of Dynatron 550 Dyna-Blue is found in its consistent performance for a wide array of repair needs at an economical price. The 20-ounce container provides substantial product for multiple projects, ensuring a cost-effective approach to auto body maintenance. Its moderate shrinkage and good sandability contribute to a smooth and integrated repair, simplifying the process of preparing the surface for primer and paint. While it may require slightly more effort to achieve an ultra-fine finish compared to premium lightweight fillers, its robust nature and cost-effectiveness make it a commendable option for budget-conscious repairs.
The Affordable Fix: Why Budget-Friendly Body Repair Putty is Essential
The demand for body repair putty under $20 is driven by a confluence of practical and economic factors that make it an indispensable tool for many individuals. At its core, this need stems from the desire to maintain and improve the aesthetic and functional integrity of vehicles and other surfaces without incurring significant expense. For everyday car owners, minor dents, scratches, and imperfections are an almost inevitable part of ownership. These issues, while often cosmetic, can detract from the overall appearance and potentially lead to more serious issues if left unaddressed, such as rust. Budget-friendly putty offers an accessible solution for proactive maintenance, allowing individuals to tackle these minor repairs themselves, thereby preserving the value and visual appeal of their property.
From an economic perspective, the price point of under $20 for body repair putty represents a highly attractive cost-benefit ratio. Professional body shop repairs for even minor damage can quickly escalate into hundreds of dollars. For individuals with limited budgets or those who are cost-conscious, opting for a DIY approach using affordable putty is a significantly more economical choice. It allows for the completion of a serviceable repair that significantly improves the appearance of the damaged area, often making it virtually unnoticeable to the casual observer, at a fraction of the cost of professional intervention. This accessibility democratizes basic automotive or surface maintenance, empowering individuals to save money without compromising on the ability to address common issues.
The practicality of readily available and inexpensive body repair putty also lies in its ease of use and widespread availability. Many formulations are designed for user-friendliness, requiring minimal specialized knowledge or tools to apply effectively. This accessibility means that individuals who may not have extensive mechanical or DIY experience can still achieve satisfactory results. The low cost also encourages experimentation and learning, allowing individuals to build confidence in their repair abilities. Furthermore, the widespread availability of such products at automotive supply stores, hardware stores, and online retailers ensures that the solution is readily accessible when needed, minimizing downtime and inconvenience for the user.
Ultimately, the need for body repair putty under $20 is rooted in the universal desire for well-maintained belongings and the pragmatic approach of seeking cost-effective solutions. It caters to the do-it-yourselfer who wants to perform basic repairs, save money, and maintain the longevity and appearance of their possessions. The affordability factor removes a significant barrier to entry for minor repairs, empowering individuals to take ownership of their maintenance needs and avoid the escalating costs associated with professional services for everyday wear and tear. This makes budget-friendly putty not just a product, but a valuable tool for practical problem-solving and financial prudence.
Choosing the Right Type of Body Repair Putty
When selecting body repair putty under $20, understanding the different types available is crucial for achieving optimal results. The most common categories include polyester putties, epoxy putties, and vinyl patch/gluing compounds. Polyester putties, often referred to as “Bondo,” are excellent for filling dents, scratches, and minor imperfections on metal and fiberglass. They offer good adhesion and are relatively easy to sand once cured. However, they can be prone to shrinking over time if not applied correctly or in thin layers. Epoxy putties, on the other hand, are known for their superior strength and adhesion, making them ideal for more structural repairs or areas requiring high durability, such as on plastic bumpers or even wood. They typically come in a two-part system that must be mixed precisely, offering a robust and long-lasting bond. Vinyl patch compounds are generally softer and more flexible, designed for repairing flexible plastics or rubberized surfaces, though their durability might be less than polyester or epoxy options.
Application Techniques for a Seamless Finish
Achieving a seamless finish with body repair putty under $20 relies heavily on proper application techniques. Before applying any putty, thorough surface preparation is paramount. This involves cleaning the damaged area to remove dirt, grease, and rust, followed by sanding to create a rough surface for better adhesion. The putty itself should be mixed according to the manufacturer’s instructions, paying close attention to the ratio of hardener to putty. Applying the putty in thin, even layers is critical; thick applications can lead to uneven drying, cracking, and difficulty in sanding. Using a high-quality putty knife or spreader, work the putty into the defect, ensuring it’s slightly overfilled to allow for sanding down to the surrounding surface. Promptly remove any excess putty from surrounding areas before it begins to cure.
Sanding and Finishing for a Professional Look
Once the body repair putty has cured according to the product’s specifications, the next critical stage is sanding and finishing. Initial sanding should be done with a coarser grit sandpaper (e.g., 80-120 grit) to shape the putty and level it with the surrounding surface. It’s essential to use a sanding block or a flexible sanding pad to maintain a smooth contour and avoid creating low spots or unevenness. Progress to finer grit sandpapers (e.g., 180-220 grit) to further smooth the repaired area and prepare it for priming. The goal of sanding is to make the repaired area indistinguishable from the original surface. After sanding, the area should be cleaned thoroughly to remove all dust before applying primer. Multiple thin coats of primer are preferable to one thick coat, allowing each to dry and be lightly sanded with even finer grit sandpaper (e.g., 320-400 grit) for a perfectly smooth surface ready for paint.
Troubleshooting Common Body Repair Putty Issues
Even with the best products, users may encounter common issues when working with body repair putty under $20. One frequent problem is the putty not hardening, which is often due to improper mixing of the hardener, an incorrect ratio, or working in temperatures outside the recommended range. Ensuring accurate measurements and appropriate environmental conditions can prevent this. Another issue is the putty shrinking or cracking after application. This can be caused by applying the putty too thickly, inadequate surface preparation, or using an incompatible product for the substrate. Thin, layered applications and proper adhesion are key to avoiding shrinkage. If the putty is difficult to sand, it might be due to incomplete curing or the use of too coarse a grit too early. Patience and the progression through finer grits are essential for smooth sanding. Finally, poor adhesion can result from a dirty or greasy surface, so rigorous cleaning is always the first step in troubleshooting.
The Best Body Repair Putty Under $20: A Practical Buyer’s Guide
The quest for cost-effective and efficient solutions for minor vehicle cosmetic imperfections often leads consumers to explore the world of body repair putty. For those working with a budget of under $20, selecting the right product is crucial to achieving satisfactory results without compromising quality or spending excessive amounts. This guide aims to demystify the selection process by analyzing the key factors that distinguish effective and affordable body repair putties. By understanding these elements, consumers can confidently identify the best body repair putty under $20 that meets their specific needs, from filling small dents and scratches to preparing surfaces for painting. We will delve into the practical considerations that impact performance, ease of use, and long-term durability, ensuring that budget-conscious individuals can achieve professional-looking repairs.
Adhesion Properties and Substrate Compatibility
The primary function of body repair putty is to adhere securely to the damaged surface and remain in place through various environmental conditions. For putties under $20, robust adhesion is paramount, as inferior bonding can lead to peeling, cracking, or detachment of the repair over time. Look for products explicitly stating compatibility with common automotive substrates such as bare metal (steel, aluminum), primed surfaces, and even certain plastics. Some formulations, like those incorporating methacrylate resins, are known for their excellent adhesion to a wide range of materials due to their ability to create strong chemical bonds. Testing the putty’s adhesion on a small, inconspicuous area of the vehicle before committing to a larger repair is always recommended. A putty that demonstrates strong initial tack and maintains a firm bond without lifting or bubbling after application and curing is a strong indicator of good adhesion properties.
Furthermore, the longevity of the adhesion is directly linked to the putty’s resistance to thermal expansion and contraction, a common phenomenon in automotive applications due to temperature fluctuations. Putties formulated with fine fillers and flexible resin systems tend to offer superior adhesion retention in these dynamic environments. For example, products that cite good performance in both high heat and cold temperatures suggest a more stable and resilient bond. Observing user reviews that mention the putty’s performance after exposure to various weather conditions can provide valuable insights into its long-term adhesion capabilities. A putty that adheres well not only ensures a durable repair but also minimizes the risk of the repair failing prematurely, thus saving the user from redoing the work.
Workability and Sandability
Once applied, the putty needs to be easily workable, allowing for shaping and smoothing to match the contours of the damaged area. For putties under $20, this means a formulation that is not overly stiff or difficult to spread, yet also cures at a reasonable pace to prevent slumping or sagging before it can be manipulated. Many affordable putties utilize polyester resin systems, which offer a good balance between workability and cure time, typically allowing for 15-25 minutes of working time at room temperature. The consistency of the putty, often described as creamy or spreadable, directly impacts the ease of application. A putty that is too thick will require more effort to spread evenly, potentially leading to uneven application and more post-application finishing work.
Equally important is the sandability of the cured putty. The ability to sand the repaired area smoothly and easily is critical for achieving a seamless finish, especially when preparing for paint. Putties that are too hard can clog sandpaper quickly, requiring frequent replacement and increasing labor time. Conversely, putties that are too soft can be difficult to shape and may tear or gouge under the sandpaper. Look for products that are specifically designed for easy sanding, often indicated by terms like “easy sanding,” “fine grit sandable,” or a recommended grit range for initial sanding, typically starting from 180-220 grit and progressing to finer grits. User testimonials often highlight the sandability of a product, with many appreciating putties that sand down cleanly without excessive dust or loading of sandpaper, indicating a good balance of hardness and grain structure within the putty.
Durability and Crack Resistance
The durability of a body repair putty refers to its ability to withstand minor impacts, vibrations, and environmental stresses without cracking or becoming brittle. For budget-friendly options, finding a putty that offers good crack resistance is essential for a long-lasting repair. Many affordable putties are based on standard polyester resins, which can become brittle over time, especially if not applied correctly or exposed to significant flexing. Look for formulations that mention some degree of flexibility or resilience. Some products incorporate additives that enhance their flexibility, reducing the likelihood of cracking, particularly in areas that may experience minor movement.
Data from industry testing often shows that putties with finer filler particles and a higher resin-to-filler ratio tend to exhibit better crack resistance. These formulations can better absorb stress without fracturing. While specific data for products under $20 can be scarce, user reviews frequently comment on how well a repair holds up over time, specifically mentioning whether cracking has occurred. A putty that users report as remaining intact and free of cracks after several months or years, even in areas subject to road vibration or minor flexing, is a strong indicator of good durability. Choosing a putty that is known for its resilience will ultimately contribute to a more robust and visually appealing repair that is less prone to failure.
Shrinkage and Filling Capability
When putty cures, some degree of shrinkage is natural as the solvents evaporate or chemical reactions occur. However, excessive shrinkage can lead to the formation of a visible depression or “sink” in the repaired area, requiring additional filler or creating an uneven surface. For the best body repair putty under $20, minimal shrinkage is a key characteristic. Putties designed for automotive use typically undergo rigorous testing to minimize this effect. Look for products that are described as “low-shrink” or “non-shrinking,” although complete absence of shrinkage is rare.
The filling capability of a putty is its ability to effectively fill voids and irregularities without requiring multiple applications. This is directly related to its viscosity and how well it levels out. A putty that can be applied in thicker layers without sagging or pulling away from the substrate is generally considered to have good filling capabilities. Many affordable putties offer good filling power for minor imperfections. However, for deeper dents or gouges, a putty that requires only one or two applications to achieve a level surface will be more efficient and provide a better initial result. User feedback often highlights how many layers of putty were needed to fill a particular damage, with those requiring fewer applications being preferred for their efficiency and effectiveness in creating a smooth, uniform surface.
Cure Time and Application Temperature Range
The cure time of a body repair putty dictates how quickly it becomes hard enough to be sanded and painted. For DIY users, a manageable cure time is important, allowing sufficient working time to apply the putty properly without it hardening too quickly. For putties under $20, typical cure times range from 20 minutes to an hour for initial hardening, with full cure occurring over several hours. Some products may offer faster-curing options, which can be beneficial for those on a tight schedule, but it’s important to ensure this doesn’t compromise workability. Always check the product’s instructions for specific cure times at different temperatures.
The application temperature range is another crucial factor, as temperature significantly affects cure speed and the putty’s consistency. Most affordable putties are designed to be applied in moderate temperatures, typically between 60°F and 80°F (15°C and 27°C). Applying putty in temperatures outside this range can lead to either a very slow cure (in cold conditions) or a very rapid cure that reduces working time and can result in a weaker bond (in hot conditions). Reputable products will clearly state their recommended application temperature range. For instance, many polyester-based putties may suggest avoiding application below 50°F (10°C) to ensure proper curing. Understanding and adhering to the recommended temperature range is vital for achieving optimal results and a durable repair.
Finish Quality and Paint Adhesion
The ultimate goal of using body repair putty is to create a smooth, imperceptible repair that blends seamlessly with the surrounding paintwork. This means the putty itself must provide a fine finish after sanding, and crucially, it must adhere well to automotive primer and paint. For the best body repair putty under $20, the surface left after sanding should be smooth and free of pinholes or rough textures that would telegraph through the paint. Many manufacturers achieve this through the use of fine-quality fillers and resins that break down cleanly under sandpaper.
The ability of the putty to accept primer and paint without adverse reactions is also critical. Some cheaper putties may contain impurities or have a surface that is not ideal for paint adhesion, leading to issues like paint lifting or poor gloss. Products that are specifically formulated as “paintable” and designed to be used as part of a multi-step repair process (putty > primer > paint) are generally more reliable. User reviews often comment on how well the repaired area takes primer and how the final paint job looks, with positive feedback indicating smooth color and gloss matching. A putty that results in a smooth, paintable surface without the need for extensive re-sanding or special primers will prove to be the most effective and cost-efficient choice for achieving a professional-looking finish.
FAQs
What types of damage can body repair putty under $20 fix?
Body repair putty under $20 is primarily designed for addressing minor cosmetic imperfections in vehicle bodies. This typically includes small dents without sharp creases, scratches that haven’t penetrated the base coat, and minor surface imperfections like stone chips or paint chips. The putty’s composition, often a resin or epoxy-based filler, allows it to adhere well to primed or painted metal surfaces and can be sanded smooth to blend with the surrounding panel.
While effective for minor damage, it’s crucial to understand the limitations of these budget-friendly putties. They are not intended for structural repairs, deep rust damage, or areas requiring significant material build-up. Attempting to repair large holes or extensive rust with under-$20 putty will likely result in a weak, temporary fix that could fail over time, potentially causing more damage or posing a safety risk. Always assess the extent of the damage to ensure the putty is an appropriate solution.
How do I choose the best body repair putty under $20 for my specific repair?
When selecting a body repair putty under $20, consider the type of material you’re working with and the desired finish. For most automotive applications, a polyester-based or epoxy-based putty is recommended due to their excellent adhesion to metal and ability to withstand temperature fluctuations. Look for products specifically marketed for automotive bodywork, as they are formulated to be compatible with automotive paints and primers. Read product descriptions carefully for details on curing time, sandability, and flexibility, as these factors will influence the ease and quality of your repair.
Pay close attention to user reviews and ratings. Often, affordable products may have a wider variance in quality. Reviews can highlight specific strengths or weaknesses of a particular putty, such as ease of mixing, smoothness of application, or durability after curing. For instance, if multiple users praise a putty’s sandability, it suggests a finer finish will be achievable, which is crucial for blending seamlessly. Conversely, if many complain about it shrinking excessively, it might be less ideal for larger repairs.
What is the typical curing time for body repair putty under $20, and does it affect the repair?
The curing time for body repair putty under $20 can vary significantly depending on the product’s formulation and the ambient temperature and humidity. Generally, most single-component putties or two-part kits will indicate a workable time and a full cure time. Workable time refers to how long you have to apply and shape the putty before it begins to harden. Full cure time is when the putty has reached its maximum hardness and can be sanded and painted without issue.
Adhering to the manufacturer’s recommended curing time is paramount for a successful repair. Rushing the sanding or painting process before the putty is fully cured can lead to cracking, peeling, or an uneven finish. For example, if a putty requires 24 hours for a full cure, sanding it after only 2 hours will likely result in the sandpaper clogging and tearing the still-soft material. Longer curing times often indicate a more robust and durable bond, which is generally beneficial for automotive bodywork.
Can I paint over body repair putty under $20? If so, what steps are necessary?
Yes, body repair putty under $20 is designed to be painted over once it has fully cured and been properly prepared. The key to a successful paint job lies in meticulous surface preparation. After the putty has cured, it must be sanded smooth to create a uniform surface that is flush with the surrounding panel. Start with a coarser grit sandpaper (e.g., 180-220 grit) to shape the putty and then progressively move to finer grits (e.g., 320-400 grit) to achieve a smooth finish.
Following sanding, the area must be thoroughly cleaned to remove all dust and contaminants. This typically involves using a degreaser or wax and grease remover. Once clean, apply an automotive primer over the sanded putty. Primer acts as a bonding agent for the paint and helps to seal the putty, ensuring a uniform color match. After the primer has dried, you may need to lightly wet-sand it with very fine grit sandpaper (e.g., 600-800 grit) before applying your base coat of paint, followed by clear coat, to achieve a seamless and professional-looking finish.
How does the durability of body repair putty under $20 compare to more expensive options?
The durability of body repair putty under $20 is generally adequate for minor cosmetic repairs but may not match the long-term resilience of premium brands. Budget-friendly putties often utilize simpler resin systems or fillers, which can sometimes lead to issues like slight shrinking over time, susceptibility to impact damage, or a less forgiving surface for sanding. While they can provide a solid repair for small dings and scratches, they might not withstand the stresses of significant impacts or extreme temperature fluctuations as well as higher-end products formulated with advanced polymers or fiberglass reinforcement.
However, for the price point, many under-$20 putties offer a surprisingly good balance of performance and cost-effectiveness. The success of any putty, regardless of price, is heavily reliant on proper application, preparation, and curing. A well-applied and thoroughly cured budget putty can often outperform a poorly applied premium product. For typical garage use on minor imperfections, the durability of a good quality under-$20 putty is usually sufficient, but for critical structural repairs or areas subjected to constant stress, investing in a higher-grade product is advisable.
Are there specific tools recommended for applying and finishing body repair putty under $20?
Yes, specific tools greatly enhance the application and finishing of body repair putty under $20, leading to a much cleaner and more professional result. For application, a set of flexible plastic or metal spreaders of varying sizes is essential. These allow for even pressure distribution and help to feather the putty to a thin edge, minimizing the amount of sanding required. A small, stiff brush can be useful for working putty into intricate areas or scratches.
For the finishing stages, a variety of sandpaper grits is crucial. Starting with a coarser grit (around 180-220) for initial shaping, progressing through medium grits (320-400) for smoothing, and finishing with fine grits (600-800) for primer prep is standard. Consider using a sanding block, especially for larger flat areas, to ensure an even surface and prevent creating dips or high spots. Lastly, a tack cloth is indispensable for removing any remaining dust or debris before priming and painting.
What are the most common mistakes to avoid when using body repair putty under $20?
A very common mistake when using body repair putty under $20 is inadequate surface preparation. This includes failing to clean the damaged area thoroughly, not removing loose paint or rust, and not sanding the area to provide a good adhesion surface. The putty needs a clean, slightly roughened surface to bond effectively. Applying putty over dirt, grease, or glossy paint will almost guarantee a failed repair, leading to the putty peeling or cracking later.
Another frequent error is not allowing the putty to cure completely before sanding or painting. As mentioned, impatience can lead to poor results. Overfilling the dent or scratch is also a common pitfall, as it creates significantly more sanding work and increases the risk of creating an uneven surface. It’s better to apply multiple thin layers of putty, allowing each to cure sufficiently, rather than trying to fill the entire imperfection in one go. This approach helps prevent excessive shrinkage and makes the sanding process more manageable.
Final Verdict
This review and buying guide has meticulously examined numerous affordable body repair putties, focusing on performance, ease of use, adhesion, and durability for users seeking effective solutions without exceeding a $20 budget. The analysis highlighted that while price is a significant factor, the underlying quality of the formulation dictates successful repairs. Key considerations included the putty’s sandability, drying time, and its ability to accept paint, all crucial for achieving a seamless finish. Ultimately, the “best body repair putty under $20” category offers viable options for minor automotive dents, scratches, and imperfections, provided users understand the specific characteristics of each product.
Our comparative analysis reveals that while many budget-friendly putties deliver adequate results for small jobs, those with superior filler content and finer grit sandability consistently outperform their counterparts. Specifically, putties that offer a smooth application, minimal shrinkage, and excellent adhesion to various metal and plastic surfaces without requiring extensive post-application work are the most advantageous for DIY enthusiasts. Neglecting to consider these finer points can lead to frustrating rework and a less-than-professional outcome.
Based on the evidence presented, for users prioritizing a balance of affordability and performance in the sub-$20 market, our recommendation leans towards putties that explicitly state a fine-grit sanding capability and a non-shrinking formula. These attributes, often found in products from reputable automotive refinishing brands, offer the most reliable path to a professional-looking repair, ensuring both cost-effectiveness and a durable, smooth surface ready for priming and painting, making them the true contenders for the best body repair putty under $20.