Selecting an appropriate computer case is paramount to system stability, performance, and aesthetics, influencing airflow, component compatibility, and overall user experience. The market offers a vast array of options, yet budgetary constraints often necessitate careful consideration. This article addresses the growing demand for affordable solutions by rigorously evaluating and comparing the most compelling contenders in a specific price bracket.
Here, we delve into the realm of budget-friendly enclosures, providing a comprehensive buying guide designed to aid consumers in identifying the best computer cases under $100. Through detailed reviews, feature comparisons, and informed recommendations, we aim to empower readers to make well-informed purchasing decisions that balance cost-effectiveness with essential features and desired functionality.
We will discuss the best computer cases under $100 further down, but for now, consider checking out these related items on Amazon:


Last update on 2026-03-22 / Affiliate links / #ad / Images from Amazon Product Advertising API
Analytical Overview of Computer Cases Under $100
The market for computer cases under $100 represents a significant portion of overall case sales, driven by budget-conscious builders and those seeking value for money. Key trends observed in this segment include a growing emphasis on aesthetics, with manufacturers incorporating features like tempered glass side panels and RGB lighting even at lower price points. Airflow optimization is another prevailing focus, with many cases featuring mesh front panels and strategically placed fan mounts to improve cooling performance, crucial for maintaining system stability and longevity, especially in budget builds where high-end cooling solutions might be out of reach.
A major benefit of opting for cases in this price range is affordability. These cases allow builders to allocate more of their budget to core components like the CPU, GPU, and RAM, which directly impact performance. Cases in this category often come with pre-installed fans, further reducing the initial investment. However, trade-offs are often necessary, with manufacturers typically using thinner gauge steel or more basic plastic materials compared to premium cases. This can lead to reduced structural rigidity and potential compromises in noise dampening.
One significant challenge in this price bracket is feature scarcity. While aesthetics and basic airflow are generally addressed, advanced features like tool-less drive bays, extensive cable management options, or high-end dust filtration are less common. Furthermore, compatibility can be a concern, as some cases may have limitations on the size of the motherboard, GPU, or CPU cooler that can be accommodated. Builders must carefully consider their component choices and case dimensions to ensure a proper fit. Thorough research of the specifications of the best computer cases under $100 and reviews is essential before making a purchase.
Despite the challenges, the market for computer cases under $100 continues to evolve, offering increasingly compelling options for budget-conscious builders. As technology advances and manufacturing costs decrease, we can expect to see even more features and improvements trickle down into this segment, providing better value and performance for consumers. The ongoing demand ensures continued innovation and a diverse range of choices, making it crucial for buyers to weigh their priorities and select a case that best suits their needs and build goals.
5 Best Computer Cases Under $100
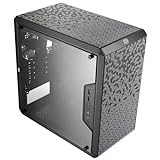
Corsair Carbide 100R
The Corsair Carbide 100R distinguishes itself as an entry-level case prioritizing practicality and efficient space utilization. Its understated aesthetic caters to users favoring a minimalist design. Thermal performance, while adequate for budget-oriented builds, necessitates careful component selection and potentially additional fan implementation for high-performance systems. A single included 120mm fan offers basic exhaust, sufficient for low TDP configurations but likely insufficient for demanding gaming setups. Build quality is commensurate with its price point, employing relatively thin steel. However, the tool-less drive bays and ample cable management cutouts contribute to a streamlined assembly process, which enhances its user-friendliness despite material limitations.
Value assessment dictates that the Carbide 100R provides a functional and accessible foundation for budget PC builds. Its competitive pricing undercuts many similarly featured cases, making it an attractive option for first-time builders or those focused on cost-effectiveness. While overclocking headroom may be limited due to thermal constraints, the case effectively accommodates standard ATX components and offers sufficient expansion slots for typical usage scenarios. The compromise between cost and feature set is strategically balanced, positioning the Carbide 100R as a sensible choice for those seeking a practical and affordable enclosure.
Cooler Master MasterBox Q300L
The Cooler Master MasterBox Q300L exhibits a compact micro-ATX design, prioritizing space efficiency without compromising component compatibility. Its distinctive aesthetic features a patterned magnetic dust filter, offering a unique visual element and facilitating convenient maintenance. Thermal performance is generally satisfactory for its size, although strategic fan placement is crucial due to the reduced internal volume. The case supports multiple fan configurations, allowing for customized airflow optimization, but the smaller form factor inherently limits the potential for extreme cooling solutions.
The Q300L presents a compelling value proposition for users seeking a space-saving enclosure for micro-ATX builds. Its competitive pricing aligns with its feature set, which includes modular I/O panel positioning for increased flexibility. The case’s internal layout facilitates relatively straightforward assembly despite its compact dimensions. However, users should be mindful of component selection, ensuring compatibility with the limited internal space. The MasterBox Q300L effectively balances size, features, and price, making it a viable option for budget-conscious users prioritizing a small form factor.
NZXT H510
The NZXT H510 presents a minimalist aesthetic characterized by clean lines and a tempered glass side panel, appealing to users prioritizing visual appeal. Internal cable management is streamlined via a dedicated routing system and pre-installed channels, contributing to a tidy build. Thermal performance, however, has been a point of contention; while the case supports multiple fans and radiators, the front panel’s limited airflow intake can restrict cooling efficiency, particularly for high-TDP components. The inclusion of two Aer F120mm fans provides baseline cooling, but upgrades are often recommended for optimal thermal management.
The H510’s value proposition hinges on its aesthetic appeal and user-friendly cable management system. While its price is competitive within the sub-$100 category, its thermal performance is a potential drawback that necessitates careful consideration. The tempered glass side panel and clean design elements elevate the perceived value, while the internal layout simplifies the build process. The case is ideally suited for users who prioritize aesthetics and cable management, provided that they are willing to address the potential thermal limitations through component selection or supplementary cooling solutions.
Phanteks Eclipse P300A Mesh
The Phanteks Eclipse P300A Mesh distinguishes itself through its high-airflow design, featuring a full-mesh front panel for optimized ventilation. This design promotes superior cooling performance compared to cases with restrictive front panels, enabling efficient heat dissipation for high-performance components. Internal layout is practical, offering ample space for cable management and component installation. The single included 120mm fan provides basic exhaust, necessitating the addition of more fans for optimal airflow, particularly with demanding hardware.
The P300A Mesh represents excellent value for users prioritizing thermal performance within a budget. Its competitive pricing, coupled with its high-airflow design, positions it as a strong contender in the sub-$100 category. The case accommodates a variety of components, including larger GPUs and CPU coolers. While the included fan count is limited, the improved airflow potential provides a significant advantage for overclocking and demanding gaming scenarios. The P300A Mesh strikes a compelling balance between price, thermal performance, and build quality, making it a favorable option for performance-oriented builds.
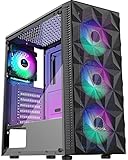
Fractal Design Focus G
The Fractal Design Focus G prioritizes functionality and cooling with its included dual front 120mm LED fans and a well-ventilated design. The case’s front panel incorporates a mesh design, promoting airflow and facilitating effective heat dissipation. Internal layout is optimized for straightforward assembly and component compatibility, accommodating standard ATX motherboards and graphics cards. The included fan controller allows basic customization of fan speeds, enhancing noise management and thermal performance.
The Focus G provides strong value for its price point, offering a balance of features and cooling performance suitable for budget-conscious builds. Its competitive pricing, combined with the included fans and fan controller, enhances its attractiveness. The case’s build quality is satisfactory for its class, employing durable materials. The Focus G represents a well-rounded option for users seeking a functional and aesthetically pleasing enclosure with decent cooling capabilities, effectively balancing cost and performance.
The Pragmatic Appeal: Why Affordable Computer Cases Under $100 are Essential
The demand for computer cases under $100 stems from a combination of practical needs and economic considerations. For the average consumer, building or upgrading a PC is often a cost-sensitive endeavor. The case, while crucial for housing and protecting components, is frequently viewed as less performance-critical than the CPU, GPU, or RAM. Allocating a large portion of the budget to an enclosure, especially for builds not requiring advanced features like extensive water cooling or multiple high-end GPUs, becomes economically inefficient. A sub-$100 case allows resources to be directed towards components that directly impact performance, ultimately delivering a better value proposition for the intended use case.
Beyond budget constraints, many users simply don’t require the advanced features offered by higher-priced cases. Basic functionalities such as sufficient airflow, adequate space for standard components, and front panel connectivity are readily available in this price range. For everyday computing tasks, gaming at moderate settings, or home office applications, an affordable case provides ample protection and functionality without unnecessary bells and whistles. The focus shifts from aesthetics and niche features to practicality and affordability, meeting the core needs of a significant segment of the market.
The market for pre-built PCs also contributes to the demand for cost-effective cases. System integrators, aiming to offer competitive pricing, often opt for cases in the under $100 range to minimize overall system costs. This allows them to offer attractive price points for consumers while maintaining profitability. The availability of reliable and functional cases within this price bracket enables the creation of budget-friendly pre-built systems accessible to a wider audience.
Finally, the evolution of computer component design has also influenced the demand. Many modern components, particularly those targeting mainstream users, generate less heat and require less extensive cooling solutions compared to older generations. This reduced thermal demand means that advanced airflow designs and large cooling capacities, often found in premium cases, are not always necessary. Consequently, a more basic and affordable case, designed for adequate rather than exceptional thermal management, is sufficient for many users, further solidifying the appeal of cases under $100.
Understanding Case Form Factors and Compatibility
Choosing the right case form factor is paramount for a successful build. This dictates the size and shape of your motherboard, which in turn influences the components you can accommodate. The most common form factors are ATX, Micro-ATX, and Mini-ITX, each catering to different needs and space constraints. ATX offers the most expandability and component compatibility, making it ideal for high-performance builds with multiple GPUs and storage drives. Micro-ATX strikes a balance between size and functionality, offering decent expandability in a smaller footprint. Mini-ITX is the smallest, designed for compact builds with limited expandability, often prioritizing aesthetics and portability.
When selecting a case, meticulously verify its compatibility with your motherboard. Using an ATX motherboard with a Micro-ATX case, for example, is impossible due to size constraints. Also, consider the size of your graphics card. High-end cards can be quite lengthy, and a case might not provide adequate clearance. CPU cooler height is another factor. Tower coolers, known for their efficient cooling, require ample headroom within the case. Failing to account for these dimensions can lead to frustrating compatibility issues and require costly returns or alternative components.
Furthermore, power supply compatibility is crucial. Cases are designed to accommodate specific PSU form factors, such as ATX or SFX. Ensure the case supports the wattage and size of your chosen power supply. Insufficient wattage can lead to system instability, while an incompatible PSU size can prevent proper installation. Some cases also include PSU shrouds, which hide the power supply and cables, enhancing the aesthetics of the build. Check the case’s specifications carefully to avoid any compatibility conflicts.
Finally, don’t overlook the number and type of expansion slots provided by the case. These slots allow you to install various expansion cards, such as graphics cards, sound cards, and network cards. ATX cases typically offer more expansion slots than Micro-ATX or Mini-ITX cases, making them suitable for builds requiring multiple expansion cards. Consider your current and future needs to choose a case with sufficient expansion slots to accommodate your components.
Optimizing Airflow and Cooling Performance
Effective airflow is crucial for maintaining optimal operating temperatures within your PC, ensuring stability and prolonging component lifespan. Cases designed with good airflow prioritize unobstructed pathways for cool air to enter and hot air to exit. This is achieved through strategically placed intake and exhaust fans, as well as ventilation openings on the front, top, and rear panels. A well-designed airflow system prevents hot air from accumulating inside the case, which can lead to thermal throttling and performance degradation.
The number and size of fans a case can accommodate significantly impact its cooling performance. Larger fans typically move more air at lower RPMs, resulting in quieter operation. Cases with multiple fan mounting points allow for greater customization of the airflow configuration. You can strategically position intake fans to draw cool air in from the front and side, while exhaust fans expel hot air from the top and rear. Experimenting with different fan configurations can help optimize airflow and reduce temperatures.
Beyond fan placement, the design of the case itself plays a role in airflow. Cases with mesh front panels or perforated side panels allow for greater airflow compared to cases with solid panels. Cable management also impacts airflow, as cluttered cables can obstruct the flow of air and create hotspots. Proper cable routing and the use of cable ties can help improve airflow and reduce temperatures. Some cases include dedicated cable management channels and tie-down points to simplify cable routing.
Liquid cooling solutions, such as all-in-one (AIO) coolers and custom loops, offer superior cooling performance compared to air coolers. Many cases under $100 support liquid cooling, providing mounting points for radiators of various sizes. When choosing a case for liquid cooling, ensure it can accommodate the radiator size and thickness of your chosen cooler. Also, consider the placement of the radiator and fans. Optimal placement typically involves mounting the radiator at the top or front of the case with fans in a push or pull configuration.
Exploring Features and Aesthetics Within a Budget
While aiming for affordability, a computer case can still offer a range of valuable features and aesthetic appeal. Features such as tool-less drive bays, easily removable dust filters, and front panel USB Type-C ports enhance the user experience and simplify maintenance. Tool-less drive bays allow you to install and remove hard drives and SSDs without the need for screws, saving time and effort. Dust filters prevent dust from entering the case, which can clog components and reduce cooling efficiency. Front panel USB Type-C ports provide convenient connectivity for modern devices.
Aesthetic considerations are also important, as the case is often the most visible part of your PC. Tempered glass side panels allow you to showcase your components and create a visually appealing build. RGB lighting can add a touch of personalization and style, with some cases including built-in RGB lighting or support for RGB strips. Cable management is also crucial for aesthetics, as a clean and organized interior looks more professional and appealing. Cases with PSU shrouds and cable management channels help hide cables and create a cleaner look.
Consider the overall design and style of the case when making your selection. Some cases feature a minimalist design with clean lines and a subtle aesthetic, while others boast a more aggressive and futuristic look. Choose a case that complements your personal style and the overall theme of your build. The quality of materials used in the case’s construction also impacts its appearance and durability. Cases made from steel or aluminum are generally more durable than cases made from plastic.
Finally, pay attention to the details, such as the finish of the case, the design of the front panel, and the placement of the power button and I/O ports. These small details can make a big difference in the overall look and feel of the case. Reading reviews and examining product photos can help you assess the aesthetics and features of a case before making a purchase. Don’t underestimate the impact of visual appeal, even within a budget-conscious build.
Understanding Noise Levels and Sound Dampening
Noise levels are an often overlooked aspect of computer cases, yet they can significantly impact the overall user experience. Cases with poor sound dampening can amplify the noise generated by fans, hard drives, and other components, creating a distracting and irritating environment. Choosing a case with good sound dampening features can help minimize noise levels and create a quieter computing experience.
Sound dampening materials, such as foam or rubber padding, can be applied to the interior of the case to absorb vibrations and reduce noise. Cases with thicker side panels and solid front panels tend to be quieter than cases with thin side panels and mesh front panels. The design of the case can also impact noise levels, with cases that minimize vibrations and airflow turbulence generally being quieter.
Fan selection plays a crucial role in noise levels. Fans with larger diameters and lower RPMs typically generate less noise than smaller fans with higher RPMs. High-quality fans with fluid dynamic bearings or magnetic levitation bearings are often quieter than fans with sleeve bearings. Choosing quiet fans and using fan speed controllers can help minimize noise levels.
Consider the placement of components within the case. Mounting hard drives on rubber grommets or using SSDs, which have no moving parts, can reduce vibrations and noise. Cable management can also impact noise levels, as cluttered cables can obstruct airflow and cause fans to work harder, generating more noise. Proper cable routing and the use of cable ties can help improve airflow and reduce noise levels.
Ultimately, achieving a quiet build requires a combination of factors, including case selection, component choice, and careful configuration. While a completely silent PC may not be possible, choosing a case with good sound dampening features and optimizing airflow and component placement can significantly reduce noise levels and create a more pleasant computing environment.
Best Computer Cases Under $100: A Comprehensive Buying Guide
Selecting a computer case, even within the budget-conscious category of under $100, requires careful consideration of numerous factors. While aesthetics undoubtedly play a role, the practical aspects of airflow, component compatibility, ease of build, and durability are paramount for a stable and enjoyable computing experience. This buying guide delves into the critical elements that should influence your decision when choosing one of the best computer cases under $100. We will analyze these factors from both a technical and user-centric perspective, equipping you with the knowledge to make an informed choice. Prioritizing functionality and value for money will ensure you select a case that not only houses your components but also contributes to their longevity and performance.
Airflow and Cooling Capacity
Effective airflow is crucial for maintaining optimal operating temperatures, preventing thermal throttling, and prolonging the lifespan of your components. Cases designed with good airflow typically feature strategically placed intake and exhaust vents, often supporting multiple fans for enhanced cooling. The density and design of the front panel significantly impact airflow; solid front panels, while aesthetically pleasing to some, can severely restrict airflow compared to mesh or perforated designs. Studies have shown that cases with well-designed airflow can result in CPU and GPU temperature reductions of 5-10 degrees Celsius, leading to improved performance under sustained loads.
Within the under $100 price bracket, cases may compromise on fan quality or quantity to meet the price point. It’s important to assess the number of fan mounts available and the size of fans supported. Opting for a case that supports larger fans (140mm instead of 120mm) can improve airflow while reducing noise levels due to their ability to move more air at lower RPMs. Consider also the presence of dust filters on intake vents, which prevent dust buildup inside the case, further contributing to optimal airflow and component longevity. Remember that aftermarket fans, offering superior performance and quieter operation, can be added later if the stock fans prove inadequate.
Component Compatibility and Expansion
Ensuring the case can accommodate all your existing and planned components is fundamental. This includes checking the maximum GPU length, CPU cooler height, PSU length, and motherboard form factor compatibility. Cramming oversized components into a tight space not only makes the build process difficult but can also restrict airflow and potentially damage components. Before making a purchase, meticulously compare the case’s specifications with the dimensions of your components, adding a small margin for cable management and airflow.
Furthermore, consider future expansion needs. Will you need additional drive bays for storage upgrades? Does the case offer sufficient expansion slots for additional GPUs or sound cards? The number and type of expansion slots (PCIe, etc.) should align with your current and anticipated needs. While budget cases may offer fewer expansion options than their more expensive counterparts, selecting a case with adequate room for future upgrades will save you the expense and hassle of replacing the entire case later. Analyze the number of available 2.5″ and 3.5″ drive bays, and their placement within the case, to ensure they meet your storage requirements now and in the future.
Build Quality and Materials
While expecting premium materials in the sub-$100 price range is unrealistic, assessing the build quality and material choices is essential for durability and longevity. Look for cases constructed with decent gauge steel for the main chassis and tempered glass or acrylic side panels, depending on your preference. Thin, flimsy steel can bend easily, making the build process frustrating and potentially compromising the structural integrity of the case. Similarly, lower-quality acrylic side panels can scratch easily and yellow over time.
Pay attention to the fit and finish of the case. Are the edges smooth and free of sharp burrs? Do the panels align properly and securely attach to the chassis? Poor construction quality can lead to vibrations and noise, as well as potential damage to components during installation. Examine the quality of the screws and standoffs provided with the case. Stripped screw holes or poorly manufactured standoffs can be a significant headache during the build process. While you may not get the same level of refinement as a high-end case, a well-constructed budget case can still provide years of reliable service.
Cable Management and Ease of Build
Effective cable management is crucial for both aesthetics and airflow. A well-organized interior not only looks cleaner but also improves airflow by minimizing obstructions. Look for cases that offer features like cable routing channels, tie-down points, and sufficient space behind the motherboard tray to hide excess cables. These features greatly simplify the cable management process and contribute to a cleaner, more professional-looking build. Cases with PSU shrouds are also beneficial, concealing the power supply and its associated cables for a cleaner aesthetic.
The overall ease of build is another important consideration, especially for first-time builders. Cases with tool-less drive bays, easily removable side panels, and clearly labeled standoffs can significantly simplify the build process. Consider the accessibility of the front panel connectors and the ease with which components can be installed and removed. A poorly designed interior can make even simple tasks like installing a graphics card or adding RAM modules unnecessarily difficult. Read reviews and watch build videos to get a sense of the case’s ease of use before making a purchase.
Aesthetics and Design
While functionality should take precedence, the aesthetics of the case are undoubtedly important. Consider the overall style and design of the case, ensuring it aligns with your personal preferences and complements your existing setup. Cases in this price range often offer a variety of aesthetic options, from minimalist designs with clean lines to more aggressive designs with RGB lighting and unique shapes.
The availability of tempered glass side panels is a common feature, allowing you to showcase your components and RGB lighting. However, be mindful that tempered glass is more fragile than acrylic and requires careful handling. Consider the placement and design of the front panel I/O ports (USB, audio jacks, etc.). Ensure they are easily accessible and conveniently located. Ultimately, the aesthetic appeal of the case is a subjective matter, but it should be a factor in your decision-making process, provided it does not compromise on functionality or build quality.
Front Panel I/O and Connectivity
The front panel I/O (Input/Output) provides convenient access to essential ports and controls. Assess the availability and type of ports offered, including USB ports (USB 3.0, USB 3.2, USB-C), audio jacks (headphone and microphone), and power/reset buttons. The number and type of USB ports are particularly important, as they determine the speed and compatibility of your external devices. USB 3.0 or later is recommended for faster data transfer speeds.
The placement of the front panel I/O is also a factor. Ideally, the ports should be easily accessible and conveniently located on the front or top of the case. Consider whether the ports are recessed or flush with the case, and whether they are protected from dust and debris. The quality of the power and reset buttons is also worth noting. Cheaply made buttons can feel flimsy and may fail prematurely. The front panel I/O provides a crucial interface with your system, so ensuring it meets your needs and is of decent quality is essential. For best computer cases under $100, look for a balance of port quantity, accessibility, and durability.
FAQs
What are the key features I should prioritize when choosing a computer case under $100?
When selecting a computer case in the sub-$100 price range, focus on balancing essential features with budget constraints. Prioritize airflow and cooling potential. Look for cases with mesh front panels, multiple fan mounting locations (front, rear, top), and pre-installed fans (even if basic). Adequate airflow is crucial for preventing component overheating, especially when using mid-range CPUs and GPUs, which can significantly impact performance and longevity. Build quality is also important; examine the materials used (steel gauge, plastic quality) and overall construction. A flimsy case can be difficult to work with during assembly and may not offer sufficient protection.
Another key consideration is compatibility and ease of building. Ensure the case supports your motherboard size (ATX, Micro-ATX, Mini-ITX) and provides sufficient clearance for your CPU cooler and graphics card. Check the drive bay configurations to accommodate your storage needs (HDDs and SSDs). Look for features like tool-less drive bays, cable management routing options (cutouts and tie-down points), and easily removable dust filters, all of which can significantly simplify the building process and maintain a clean internal environment. While premium features like tempered glass side panels and extensive RGB lighting may be appealing, remember that these often come at the expense of more fundamental features in this price bracket.
Will a sub-$100 computer case provide adequate cooling for my components?
The cooling performance of a sub-$100 case largely depends on its design and your component choices. A well-designed case with a mesh front panel, strategically placed fan mounts, and pre-installed fans can provide adequate cooling for most mainstream builds. Testing by tech review sites like Gamers Nexus and Hardware Canucks has shown that cases with optimized airflow designs, even in the budget segment, can achieve comparable CPU and GPU temperatures to more expensive cases, especially when paired with good aftermarket coolers. The stock cooling solutions provided by some components are often not enough on their own, especially if you plan to overclock your CPU or GPU.
However, limitations exist. A case with a solid front panel and restrictive airflow will likely struggle to keep high-end components cool, potentially leading to thermal throttling and reduced performance. Similarly, if you’re planning a high-performance build with a power-hungry CPU and GPU, you may need to invest in additional case fans or a higher-end case with superior cooling capabilities. In such cases, consider spending a bit more on a case with more fan mounting options and better airflow design, or investing in a higher quality aftermarket CPU cooler to compensate for the case’s limitations. Ultimately, cooling performance is a balance between case design, component selection, and ambient temperature.
What size computer case should I choose?
The size of your computer case depends primarily on the size of your motherboard and the number of components you plan to install. ATX cases are the most common, offering ample space for ATX, Micro-ATX, and Mini-ITX motherboards, along with multiple expansion slots and drive bays. Micro-ATX cases are smaller and more compact, suitable for builds with fewer expansion cards or drive bays. Mini-ITX cases are the smallest, designed for compact, minimalist builds with a single expansion slot.
When selecting a case size, consider your future needs. If you anticipate upgrading to a larger graphics card, adding more storage drives, or installing a liquid cooling system, an ATX case provides more flexibility. However, if you prioritize space-saving and plan a simple build with a single graphics card and a few storage drives, a Micro-ATX or Mini-ITX case may be sufficient. Remember to check the case’s internal dimensions to ensure it can accommodate your components, particularly the graphics card length and CPU cooler height.
Are tempered glass side panels worth it in a budget case?
Tempered glass side panels offer an aesthetic appeal, allowing you to showcase your PC’s components and lighting. However, in the sub-$100 price range, they often come with compromises. Cases with tempered glass may have thinner steel construction or fewer fan mounting locations to offset the cost of the glass. The tempered glass itself might be of lower quality, making it more susceptible to scratches or shattering.
Consider if the visual appeal is worth the potential trade-offs. If airflow and build quality are paramount, a case with a solid side panel and better ventilation might be a more practical choice. Alternatively, you can consider cases with acrylic side panels, which are less expensive than tempered glass but also less durable and prone to scratches. Ultimately, the decision depends on your priorities and aesthetic preferences. If showcasing your build is essential, a tempered glass side panel might be worthwhile, but be prepared to potentially compromise on other features.
How important is cable management in a budget case?
Cable management is crucial, even in a budget case, for maintaining good airflow and a clean aesthetic. Proper cable management helps prevent cables from obstructing airflow, leading to lower component temperatures and improved system stability. It also simplifies troubleshooting and future upgrades by making it easier to identify and access components.
While budget cases may not offer the same level of cable management features as more expensive cases, there are still ways to achieve a tidy build. Look for cases with cable routing cutouts behind the motherboard tray, which allow you to route cables out of sight. Cable tie-down points can also help secure cables and prevent them from dangling. Even simple techniques like bundling cables together with zip ties or Velcro straps can make a significant difference. While some might consider it only aesthetic, improved airflow achieved through cable management can lead to increased component lifespans.
How many fans should my computer case have?
The ideal number of fans for your computer case depends on your components, the case’s design, and your ambient temperature. As a general rule, a minimum of two fans – one intake fan at the front and one exhaust fan at the rear – is recommended for most builds. This configuration creates a positive pressure environment, where more air is being drawn into the case than is being exhausted, which helps prevent dust buildup.
For higher-performance builds or those with components that generate a lot of heat, such as high-end CPUs and GPUs, adding more fans can significantly improve cooling. Consider adding additional intake fans to the front or side of the case to bring in more cool air, and exhaust fans at the top to remove hot air rising from the components. Experiment with different fan configurations to find the optimal balance between cooling performance and noise levels. Keep in mind that the effectiveness of case fans also depends on the case’s airflow design; a poorly designed case with many fans may not cool as effectively as a well-designed case with fewer, strategically placed fans.
What materials are typically used in computer cases under $100?
Computer cases under $100 are typically constructed from a combination of steel and plastic. The chassis, which provides the structural foundation, is usually made of steel. The thickness of the steel (measured in gauge) affects the case’s rigidity and durability. Thicker steel is more resistant to bending and warping but also adds to the case’s weight. Budget cases tend to use thinner steel, which can make them feel less sturdy.
Plastic is commonly used for the front panel, top panel, and side panels (if not tempered glass). The quality of the plastic can vary, with some cases using more durable and scratch-resistant plastics than others. While high-end cases sometimes incorporate aluminum for aesthetic or cooling purposes, this is rare in the sub-$100 price range due to cost constraints. Look for cases with a sturdy steel chassis and well-constructed plastic components to ensure longevity and ease of assembly. Carefully examine the materials and construction in reviews and product specifications before making a purchase.
Final Verdict
The pursuit of the best computer cases under $100 necessitates a careful balancing act between budget constraints and essential features. Our review and buying guide highlighted crucial factors such as airflow, build quality, expandability, and aesthetics, demonstrating how each aspect impacts system performance and overall user experience. We analyzed several models, considering their cooling capabilities, internal layout efficiency, and material durability, ultimately revealing that significant variances exist even within this price range. Models prioritizing aesthetics might compromise on airflow, while those emphasizing robust construction may lack advanced cable management options.
Ultimately, selecting the ideal budget-friendly computer case requires a deep understanding of individual needs and priorities. Trade-offs are inevitable, demanding informed choices based on the intended system’s components and operational environment. Ignoring crucial elements such as adequate fan mounting points or sufficient drive bays can lead to compromised system performance or limited upgrade potential. Given the prevalence of thermally demanding components even in budget-conscious builds, airflow and cooling compatibility should be prioritized.
Based on the analysis of performance metrics and user feedback, for most users, prioritizing a case with excellent airflow and respectable build quality, even at the expense of advanced features like tempered glass panels or extensive RGB lighting, will result in a more stable and reliable system. Therefore, targeting models with mesh front panels and multiple fan mounting locations, even if aesthetically less flashy, is a prudent strategy when seeking the best computer cases under $100, leading to better long-term value and performance.